
By Jesika Fry
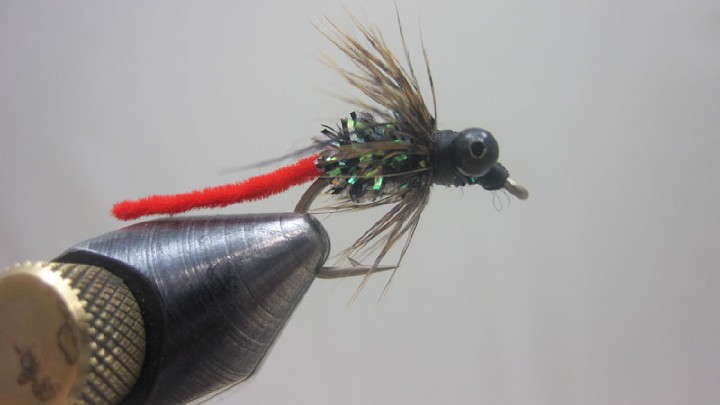
Here in Texas temperatures have been on the rise which makes for great top water fishing for bass. If I’m being frank, top water flies have taken over my fly box! I have been using this gurgler every time I get on the water over the past 4 weeks or so and it has absolutely been slamming the bass.
Materials:
- Gama B10S size 4
- 140 denier white thread
- 2- 3 mm Foam (color of your choice)
- Chartreuse Palmer Chenille
- Pearl Flashabou
- Wooly Bugger Chenille- medium- chartreuse
- Rabbit zonker barred chartreuse and white
- Hareline Saddle Hackle chartreuse and black
- Crazy legs- medium olive/purple red green flake
Steps:*Start out with a basic thread layer on the entire shank just to give a base*
1. Tie in the flash at the barb of the hook. I tie it in about halfway, and then double the flash back over to have even more hanging out the back of the hook.

2. Tie in a piece of rabbit about the size of the hook shank right on top of where you tied in your flash. I like to pinch down on the front of the rabbit while I’m tying it in to help it to cup over the top and sides of the hook to help it look cleaner. Along with this step I like to go ahead and trim my flash to about as long as my tail.
3. Cut a piece of foam that is about the width of the hook gap (about ½ an inch) and about 3 inches long. I then cut one end of the foam into a point shape in order to make it easier for me to tie in. A helpful tip is to squeeze the foam on the point that you made to make it soft on that point, which will help your thread to not cut the foam.
4. Tie in the foam right over top of where you tied in the flash and the rabbit. I wrap back on the foam quite a bit so that for a later step (flipping the foam over), there is no separation between the rabbit and the foam.
5. Tie in the tip of your hackle right on top of the foam.

6. Tie in Palmer Chenille on top of your hackle.

7. Tie in the wooly bugger chenille right on top of the hackle.
8. Wrap your wooly bugger chenille up to the front of the hook and tie it off. A helpful tip is to leave about a hook-eye length space at the front of the hook to avoid crowing the eye since we are wrapping so many materials up toward the front.

9. Next, wrap the hackle and palmer chenille together up to the front of the hook and tie off. In between wraps, stroke the materials backward to avoid wrapping over any materials.

10. Part all of the materials down the middle making a pathway for your foam to fold over. I like to trim the back of the materials toward the tie-in point so that when I fold the foam over, the materials don’t bunch up. Pull your foam over and tie off right in front of where you tied off the other materials. A helpful tip is to make a few loose wraps over the foam before making any really tight wraps so that you don’t cut the foam.

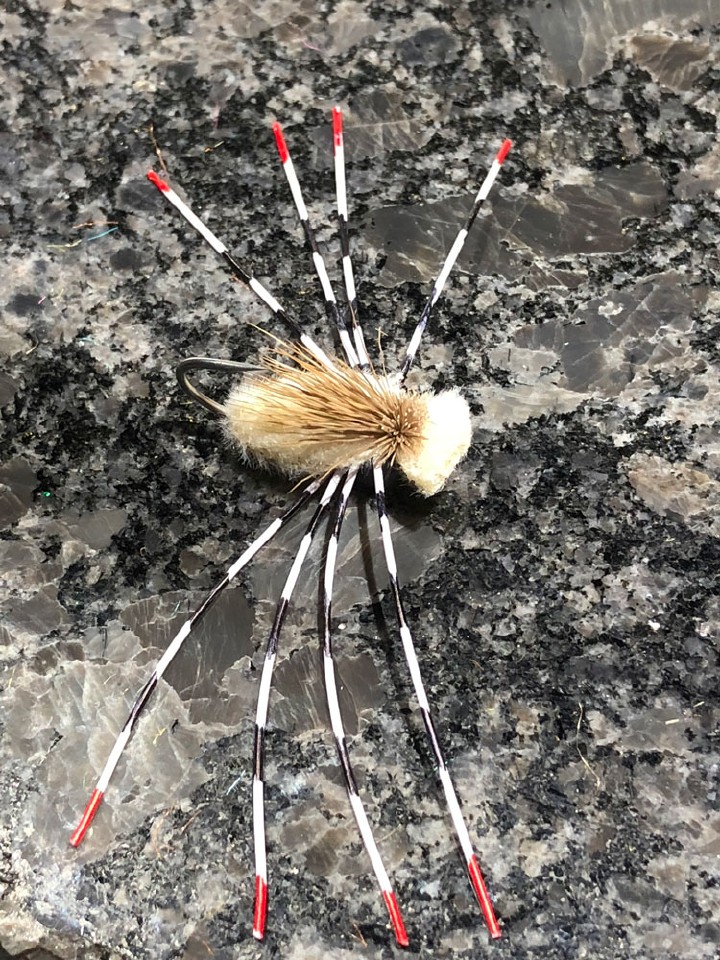
11. Tie in 2 legs on each side of the foam tie in point.

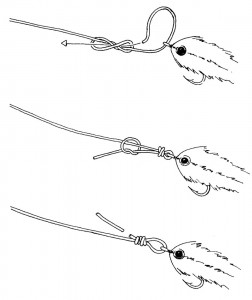
12. Bring your thread to just behind the hook eye and whip finish. Cut the excess foam off the front of the fly. I like to leave about an inch of foam out the front to make a little bit of water disturbance when I pop the fly. It is okay to cover the eye with foam because to tie in your tippet, but pull the foam back.


