
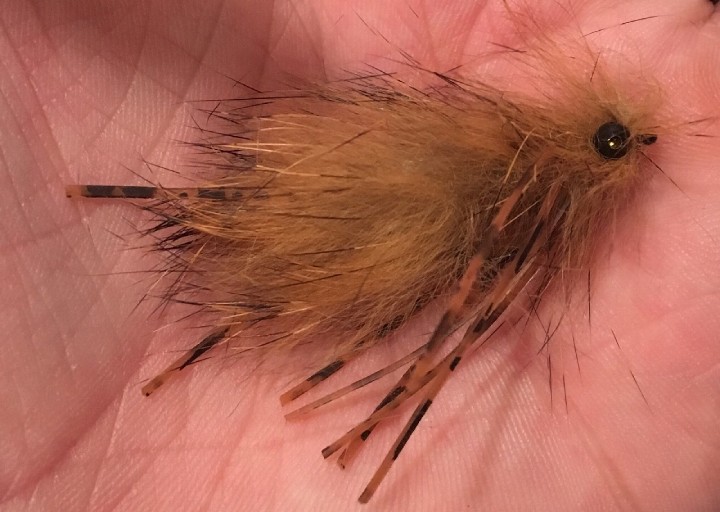
The Brule River X-Legs is an absolute must-have pattern for chasing Lake Superior steelhead on the famous Brule River in northern Wisconsin. It has caught countless fish under an indicator, even as a swung fly, and is one of the most popular stonefly patterns in the area. It works not only on the Brule, but also around the midwest for great lakes steelhead. Additionally, I’ve had success with this fly for trout on western rivers too as a substitution for something like a Pat’s Rubber Legs.
This fly can be tied with many different variations on color, size and even materials used. Here I’ve tied my own variation in one of my favorite colors.
Materials list:
Hook: TMC 5263 3x long, 2x strong down eye nymph & streamer hook size 6
Bead: Tungsten 3/16”
Wire: .25 lead free round
Thread: Veevus 8/0 brown
Tail: Hareline Ice Dub – Creepy Crawley Brown
Ribbing: Medium ultra wire – Copper
Body: Hare’s Ear Dubbing – Reddish Brown
Legs: Medium Round Rubber Legs – Brown
Wing Case: Thin or Dura Skin – Brown
Resin: Loon UV Flow – Clear
Step 1. Start by securing the hook with bead into the vise, then wrap about 18 turns of lead free wire onto the shank and push it up underneath the bead. Once the wire is pushed forward, it should cover roughly half the shank.

Step 2. Next, do a good number of wraps behind and over the top of the wire to secure it in place. Then, tie in the tail. To do this you’ll take about half the amount of creepy crawly dub you’ll actually want for the tail, fold it in half over the thread, and secure it just above where the wire ends towards the butt end of the shank. Once you have it secured, wrap it back towards the butt where you’ll want the body dubbing to begin. Do a good number of wraps along the way to make sure the creepy crawly dub stays in place.

Step 3. After this, take a good long piece of the copper ultra wire and wrap it in starting in the same place as you did with the creepy crawly dub. Wrap the wire in back down to the same place as you stopped with the creepy crawly dub, again ensuring that it is wrapped in securely.

Step 4. Next take your hare’s ear dubbing and start creating the body, ensuring that it tapers evenly up to the point where you stop. This should be about two-thirds of the way up to the bead.

Step 5. After this, take the copper wire that was tied in in step 3, and do 4-6 wraps up to where the dubbing ends.

Step 6. Cut about a 1/8”x 1/2” wide section of thin skin, then wrap it in lengthwise over the center of the exposed thread so it is protruding toward the back over the dubbing, ensuring there is enough room to fold it over the body towards the bead when you’re finished with the legs and body dubbing.
Step 7. Pull and cut about a 5” section of rubber leg off the sheet. Tie one end in with the shorter side facing the tail, and line the leg up about half way down the tail. (If that is a little long for your preference we’ll cut later, but it’s always better to tie in long so there is room to cut.) After this pull the long end of the leg to the other side of the fly, and do the same thing here so the length of the rear legs is about even.

Step 8. Take that loop that was created between the front two rubber legs from tying the two back legs in, and cut it in the center. Next, take more hare’s ear dub and carefully fill in the rest of the body up to the bead, wrapping evenly around the legs so they remain at the angle you’d like them to be. As well as this, make sure the dubbing is even so there are no odd bumps or depressions in the front end of the body.

Step 9: Take the thin skin that was wrapped in in step #6, and with slight tension pull that over the newly wrapped dubbing. Not so tightly that it is being stretched apart, but not loose either. Do a couple wraps directly behind the bead, enough to ensure that the thin skin is secure. Then trim and excess as close as possible to the bead.

Step 10. Once the thin skin is tied in and trimmed, take a little bit more hare’s ear dub and cover your wraps and the very end of the thin skin. Again here, ensure that your dubbing blends smoothly with the rest of the body and doesn’t have any odd bumps.

Step 11. That’s it! Give it a few half hitches (or whip finish if you’re about that) and shoot it with a bit of resin (I prefer the Loon UV flow clear for this application), and you’re done. You can also trim down the scraggly ends on the tail and body dubbing if you wish, or shorten the legs to your preferred length.

It may not be the most glamorous fly, but it sure does work for great lakes steelhead, trout, and probably more. It’s a fly I just about always have in my box, and one you just may want to consider adding to yours.


