
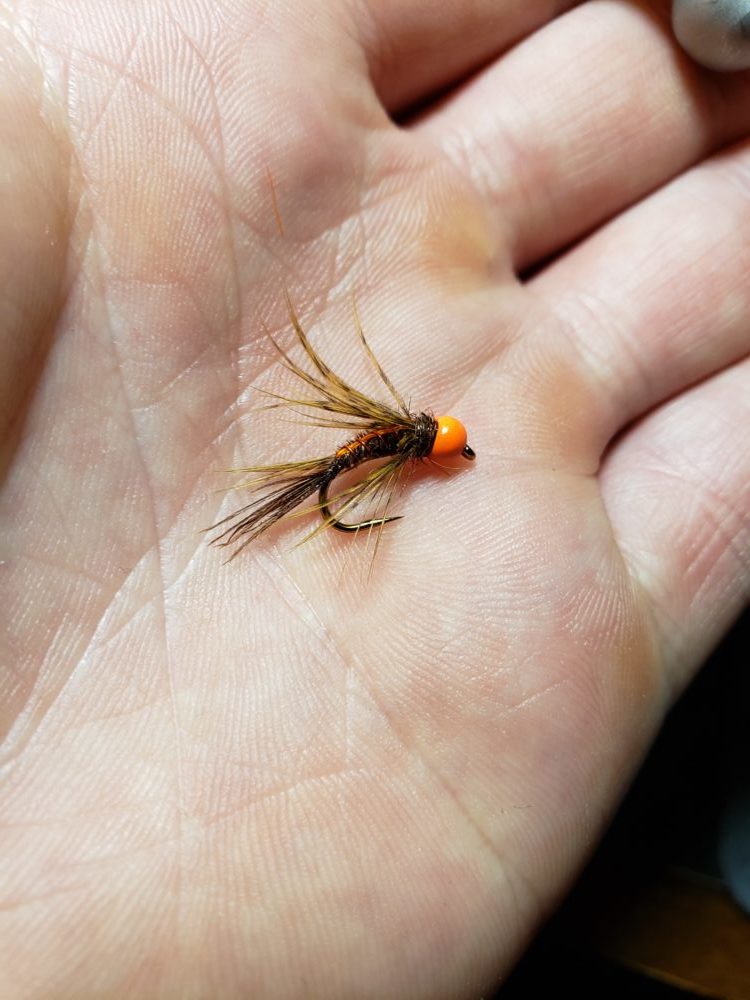
Perdigon nymphs are small, delicate, heavily weighted nymphs developed by Spanish competition anglers. These nymphs were developed to fish fast moving, technical water that see a lot of fishing pressure. The small, slick profile allows these small nymphs to get down to the feeding zone. Perdigons are typically tied in smaller sizes, as fish aren’t as fussy when it comes to smaller bugs. Bright colors and hot spots help to attract fish to you fly.

Blue Butano
I was first introduced to these flies by a teammate at the 2013 USA nationals. He shared his recipe for “Butano” fly and this style of fly has been a standard in my box since then. They are the perfect guide/competition fly due to their simplistic nature. This means that Perdigons are a simple and fast tie and can be tied in a variety of color combinations to suit your local conditions.

Quill Perdigon
I believe the key to these flies being so effective is the bright colors (hot spots) along with the contrasting spot on the fly. As these flies tumble through the water, they flash between contrasting colors, creating a strobe like effect. It’s this strobe effect that catches the attention of the fish and brings them in for a meal. I hope you give this style of fly a go and get creative with color/ material combinations. Make sure to post some pictures of your creation and tag me (@sdflyangler) on Instagram!
One of my favorite perdigons is a fusion between a X-factor (developed by Kiyoshi Nakagawa) and perdigon style. I call it the Spanish-X.
Materials:
Hook: Size 14 Umpqua C200
Bead: Gold Slotted Tungsten Size 3.3mm
Tail: Hareline Coc De Leon (CDL)
Body: Veevus 10/0 Brown thread
Rib: Haireline Red Tinsel, Size small
Hot Spot: Veevus 10/0 hot Orange
Coating: Hard as Hull / Black Revlon nail polish
Step 1: Put slotted bead on hook, slot to face rear of fly. Secure hook in vice.

Step 2: Wrap thread onto hook. I prefer to not work the thread all the way down and back. I believe this adds undo thickness and hinders the sink rate.
Step 3: Tie in a clump of CDL feathers. Length should be roughly the length of the shank. Wrap thread back with about 1/4 of the shank remaining.

Step 4: With remaining ¼ shank, tie in the Hareline Red Tinsel.

Step 5: Form a tapered body with thread.

Step 6: Wrap the tinsel up to the front of the fly, in evenly spaced wraps and secure the tinsel with thread.

Step 7: Whip Finish

Step 8: Tie in hot orange Veevus and form a hot spot around the collar. Whip finish.

Step 9: Apply a thin coat of Hard as Hull (Or your preferred varnish/ UV epoxy) and let it cure.

Step 10: Apply a black nail polish to the top side of the fly and the fly is complete. An optional step would be to do a second layer of clear finish to protect the black nail polish.


