
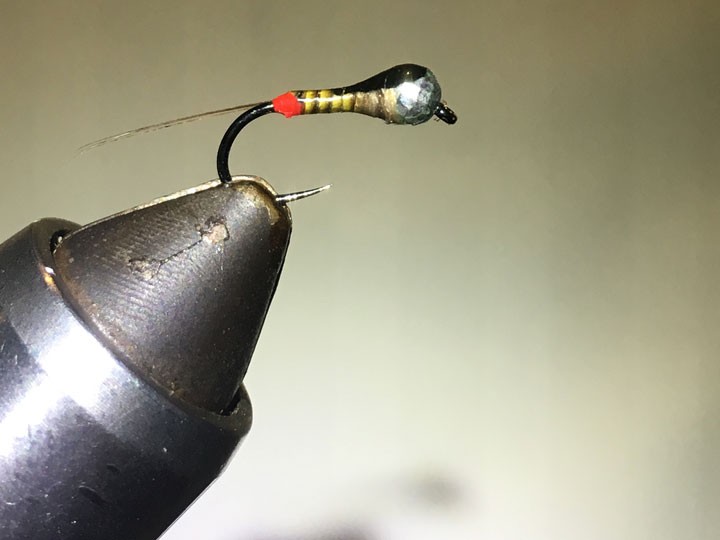
Continuing with my stillwater pattern theme I bring you a leech. Not just any leech though, a balanced leech! Now maybe not everyone has heard of a balanced leech or maybe you have and you’re just not quite sure what it means. Well today I will explain the advantages of a balanced leech and how to tie one.
The idea behind a balanced leech is quite simple really. The goal is to present a leech in a more natural manner by having it hang horizontally in the water column opposed to vertically. When the fly is tied in by the eye the tail will naturally want to fall and the leech will not appear as natural as it could. To achieve the better presentation a jig hook will be used and a pushpin to balance the fly when it is suspended in the water. This is usually fished under an indicator and the colour options are endless! This is not easy to understand without pictures, so let’s get to it!
Recipe:
- Hook: Daiichi 4647 Jig Hook #8-12
- Thread: Danville’s 70 Denier Flymaster Waxed Thread
- Bead: Metz Tungsten Beads : sizing depends on hook
- Tail: Senyo’s Fusion Dub – Various Color Options or STS Trilobal Dubbing – Various Color Options
- Body: Senyo’s Fusion Dub – Various Color Options or STS Trilobal Dubbing – Various Color Options
- Extension: Push Pin – clipped for desired presentation
Step One: Cut the push pin to about 16mm or 5/8 of an inch and place the bead on backwards. The wide opening will be facing the head of the pin.

Step Two: Start the thread directly behind the bead pushing it up against the head of the pin. Make wraps forming a ramp holding the bead in place. Whip finish when complete and cut the thread.

Step Three: Place the hook into the vise. Start your thread wraps about one eye length from the eye and wrap about 10 ten times towards the bend. Cut the tag end from your thread.

Step Four: Secure the push pin with bead to the top of the hook with several snug wraps. Don’t make these wraps extra tight as we may need to slide the pin. Cut the thread free again so we can test the balance.

Step Five: Run some thread or tippet through the eye of the hook and see how it balances. It doesn’t have to be 100% level but the closer the better. Pull the pin away from the eye of the hook as needed to level it out.

Step Six: Place the hook back into the vise, start your thread back on the hook and cut away the tag end. Wrap down to where the barb would be on the hook and secure a small amount of dubbing to the top of the hook as seen in the photo. Two to three wraps here will be lots.

Step Seven: Fold the dubbing back on top of itself towards the rear of the hook forming the tail. Make wraps on top of the fold to secure it in place.

Step Eight: Create a 5-6″ dubbing loop at the end of the fly. Sparingly add the same dubbing as the tail to the loop. Try to get the dubbing about 50/50 on each side of the thread.

Step Nine: Using your dubbing spinner of choice spin that guy up making a nice rope out of the material. Feel free to brush or pick out any trapped fibers that may have happened while spinning.

Step Ten: Wrap the spun dubbing from the back of the hook all the way to the bead. Palmer the dubbing backwards after each turn to make sure it all faces the correct direction. These do not need to be touching wraps, a little space helps the body shape in the water.

Step Eleven: Tie off the dubbing loop, whip finish with 4-5 turns, cut thread free and sit back to enjoy your work!

Now the final and most enjoyable step is to get this fly in the water! Do your best to test different water columns and retrieves to get the best results. Thanks for reading and stay tuned for more patterns.


