
The eastern tributaries of Lake Michigan are home to some of the best steelhead fishing in the great lakes region. This area is home to some fantastic anglers and guides, many of whom have made great contributions to the fishing industry. One of those guides is Kevin Feenstra, a well known guide, author, photographer and fly tyer. In terms of fly tying in particular, many of Kevin’s patterns that he has developed over the years are now commonplace in steelhead boxes around the midwest.
One of those flies in particular, the Grapefruit Leech, is a fantastic attractor pattern that falls into the ol’ reliable category working in many situations. Generally being a black leech with a lot of flash and a two tone pink and green head, there are a number of variations of this fly. Here I’ll be tying my own varion if this staple pattern.
Materials list:
- 35mm Shank
- Intruder wire
- Veevus 14/0 thread black
- Veevus 8/0 thread chartreuse
- Large Dumbell eyes, silver
- Polar Chenille, fuschia & black
- Marabou, black
- Guinea, natural & pink
- Flashabou, black & fuschia
- Polar Flash, Rainbow
- Medium Rubber Legs, black
- Ice Dub, Pink & Olive Green
- Loon UV Thin resin
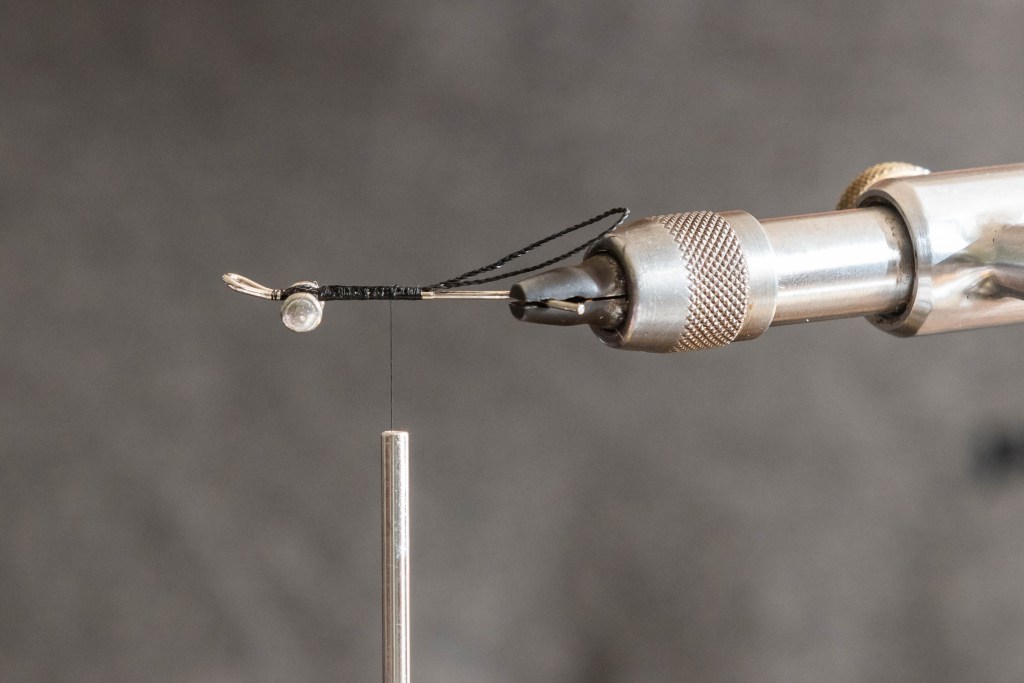
Step 1: To begin, we’ll start with a 35mm shank and the 14/0 black thread. Here I’m using the Umpqua _ series _ shank. I like this style for a lot of my steelhead flies, however really any shank works. I’ve bent out the bottom loop to hold it more securely in my vise, which I will be cutting off after the fly is finished. This will bring the length of the shank down to roughly 25mm, so I won’t be covering the full length of the shank in thread wraps. Next, I’ll tie in the dumbbell eyes just a short length behind the eye of the shank as to leave room to cover them in ice dub later on (These can be subbed for large bead chain eyes to take some weight off). After they are secure, I’ll cut about three inches of intruder wire, fold it in half and wrap it in starting just behind the dumbbell eyes. Wrapping this back to the end of the shank, this should leave plenty of room to slip hooks in and out of the loop. For this fly and many others, my go-to swing hook is a size 2 Gamakatsu Octopus.
Step 2: After the skeleton of this fly is assembled, it’s time to move onto materials. To start out, tie in three wraps of fuschia polar chenille right at the end your thread wraps. Follow this with six wraps of black polar chenille.
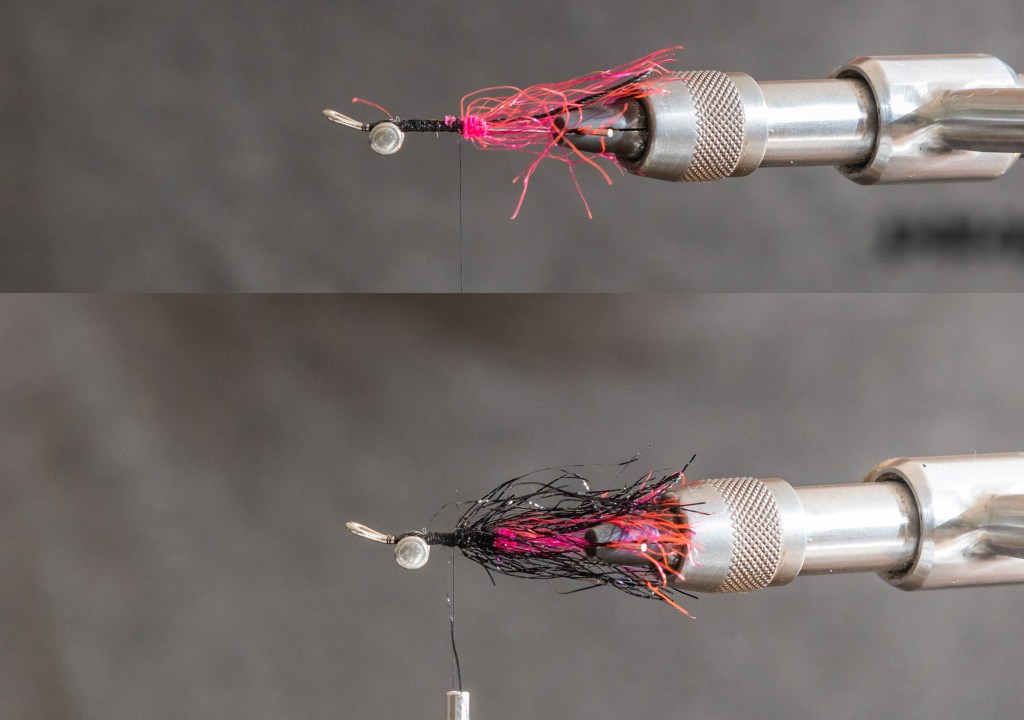
Step 3: Select two marabou feathers, and wrap them in immediately in front of the black polar chenille.
Step 4: Select one pink and one natural guinea feather, roughly one-third the length of the marabou feathers that were just tied in. Wrap both in ahead of the marabou, starting with pink followed by natural.

Step 5: Next, with black and purple flashabou you’ll want to pepper in roughly six strands of each color all the way around the marabou skirt. They should generally be close to the length of the marabou strands, with lengths varying slightly. As usual, take into consideration the fact that you can always trim strands that are too long later.

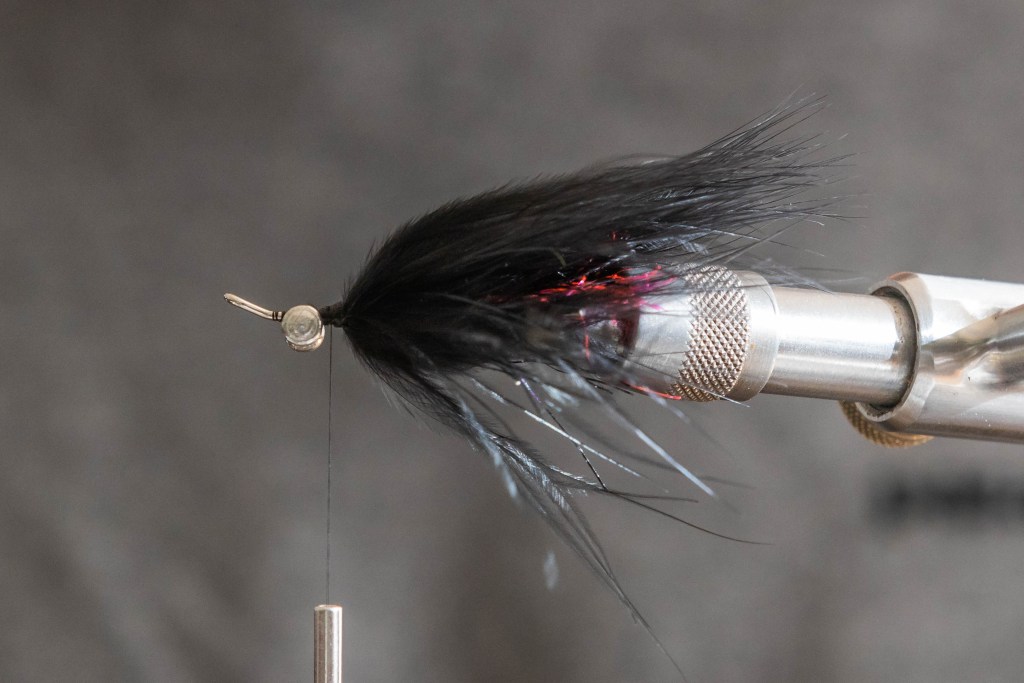
Step 6: After the flashabou is secure, cut a generous amount of polar flash. Fold it in half, and cut so the new length is half that of the full strands. Tie it in just short of the middle, with the long end of the fibers hanging off the front end of the fly. Use your fingers to splay out the fibers, as this wing should cover the entire top half of the fly. Next, fold the long side of the fibers back over the fly, again making sure they are splayed evenly, and secure them in. The longest strands should reach just past the marabou.

Step 7: After the polar flash, tie in two rubber legs the length of the marabou on each side of the fly.
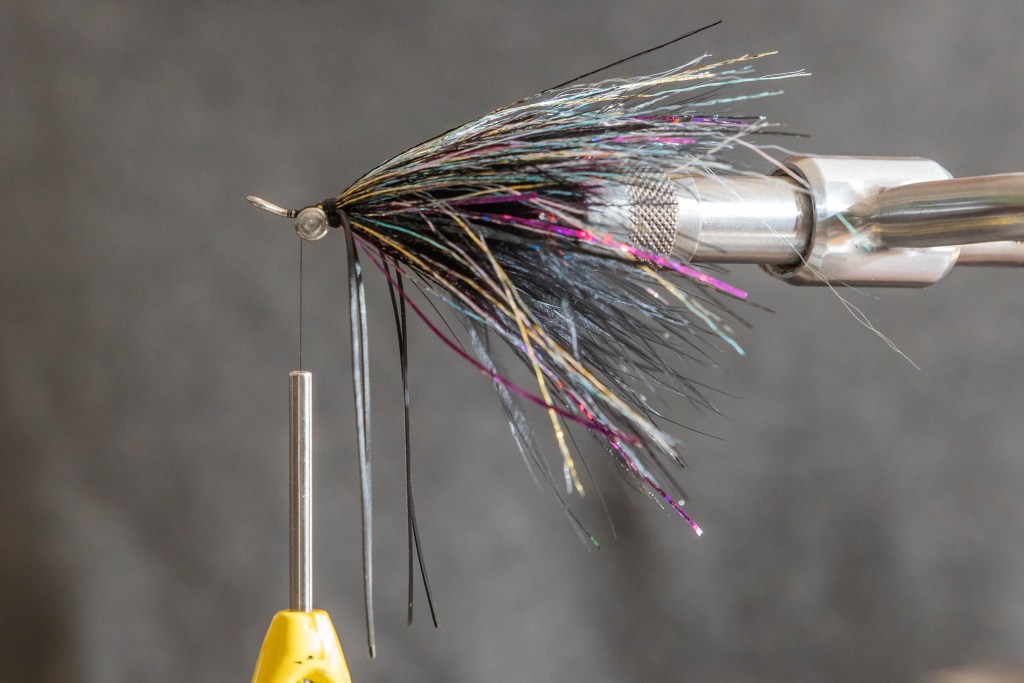
Step 8: Once the rubber legs are secure, switch to the 8/0 thread. Set up a dubbing loop with pink ice dub, using enough to cover the space between the materials and the back end of the dumbbell eyes. Spin the dubbing into the loop, brush it out and wrap it in.

Step 9: Repeat this same step with the Olive Green ice dub. Begin this with a wrap or two behind the eyes, transitioning to a couple figure-eight wraps over the dumbbell eyes to cover them up, then into a couple more wraps in front of the dumbbell eyes up to the eye of the shank.
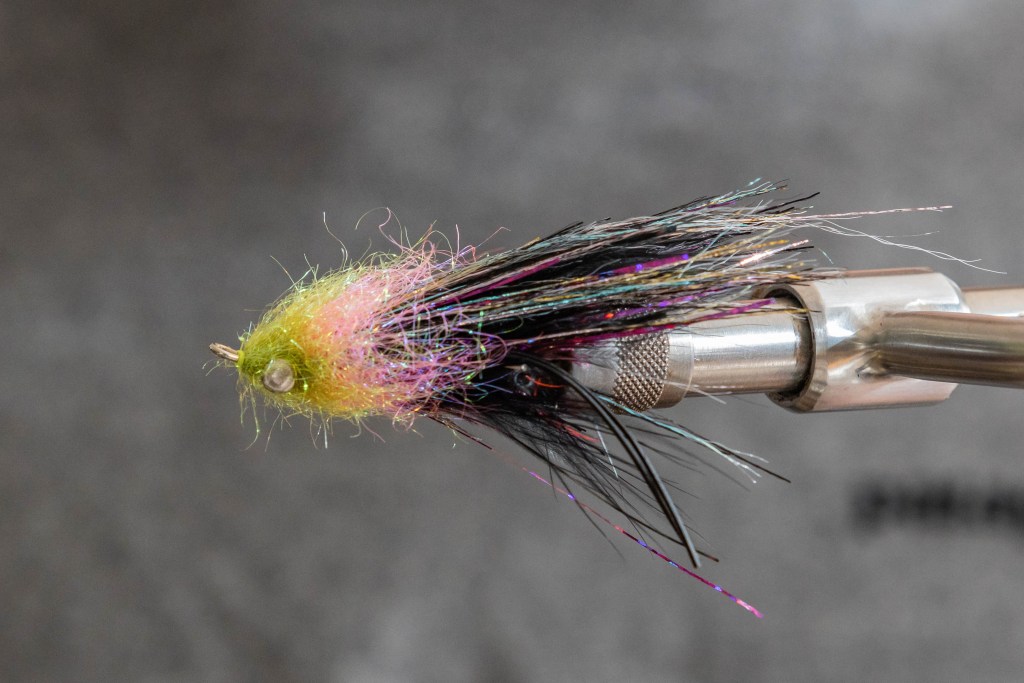
Step 10: Once both colors of ice dub are tied in, give the thread a few half-hitches or a whip finish and trim it off to get it out of the way. Take a brush and really work the head of the fly, pulling as many fibers as possible and getting everything straightened out. After a good brushing, go around the head and pull out the majority of the loose fibers that’ll come off. This should leave the ice dub at about two-thirds the original length that it was pre-brushing. Once this is done, go ahead and finish the exposed thread wraps with some UV resin.
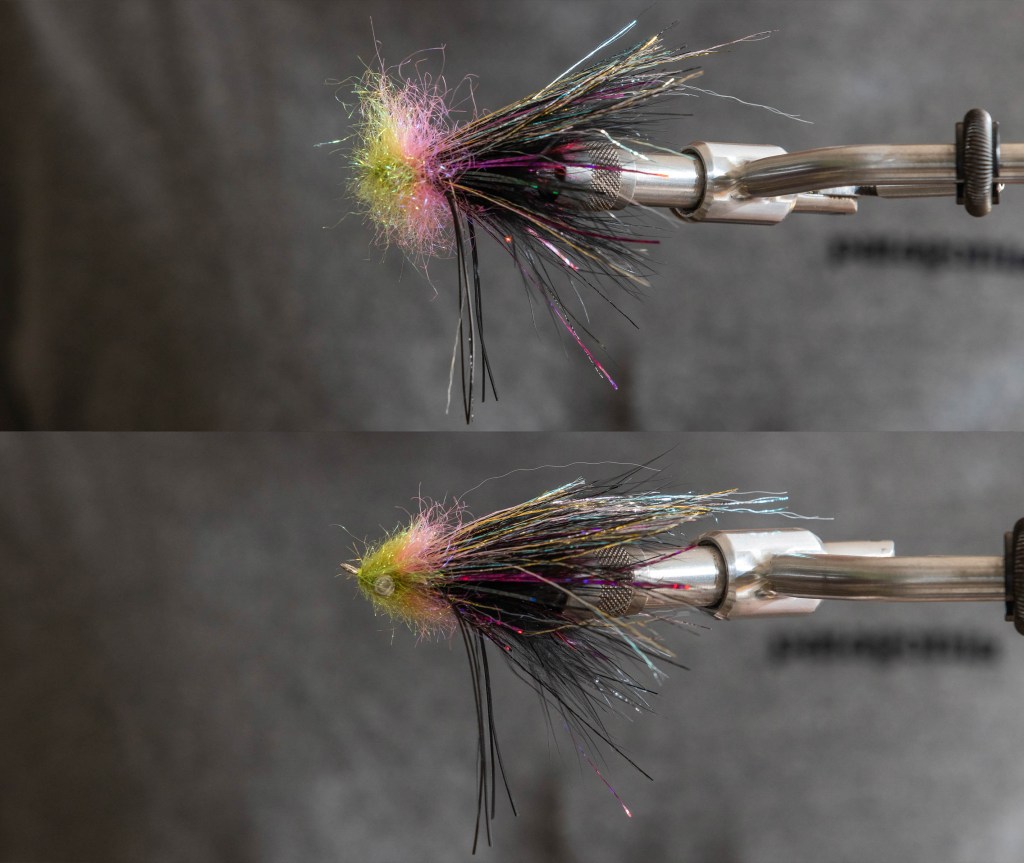
Step 11: Finally, turn the fly around and pull back all the material and intruder wire to reveal the back of the shank. Take a pliers and cut most of the excess shank off, roughly what’s shown in the image. After this is done, I like to take a light-grit sandpaper or a nail file and run it over that trimmed edge to smooth everything out and ensure there are no sharp edges or burs in the metal that could potentially damage the wire or leader when fishing.

And that’s it! A great reliable pattern that works in many places and scenarios. Relatively simple to tie, and can be tied in many versions with varied colors and materials to adapt to specific fisheries or match the preferences of the angler. Steelheading can be a difficult endeavor, which means you can never have too many tricks in your bag. Next time you’re stumped on what the fish are looking for, give the Grapefruit Leech a try.


