
By Richard Lake
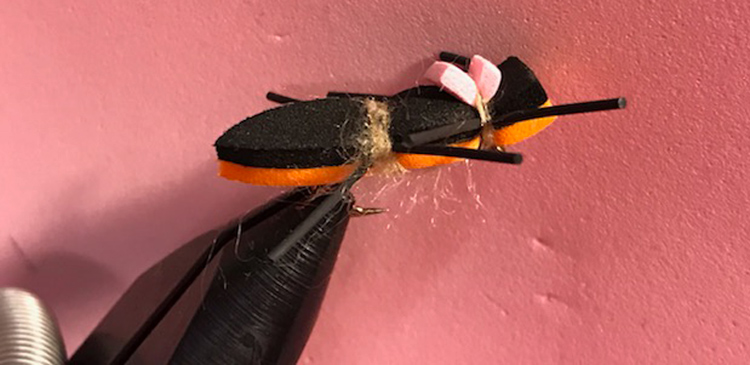
With Fishwest’s Year of the Carp Fair less than a month away it makes sense to dedicate this month’s fly tying tutorials to these rubber mouthed, hard fighting fish. Our first installment, the Hybrid Carp Worm is a go-to fly in many carp angler’s box and can be found in many fly shops across the nation, this pattern is made to represent a combination of a freshwater clam and a worm wrapped up into one package, the fact is carp just love this combo.
Hybrid Carp Worm Recipe
- Hook: Umpqua U202 or Tiemco 2499SPBL
- Thread: Black 6/0 or any dark colored thread
- Eyes: Medium Bead Chain Eyes
- Body: Peacock Krystal Flash Chenille or Peacock Herl
- Tail: Red Worm Micro Chenille
- Collar: Speckled Hen Back Natural
Step 1: Wrap your thread around the hook shank creating a nice baselayer, work it down to the bend and back up stopping at the eye of the hook.

Step 2: Back your thread about a hook eye distance away from the actual eye of the hook; this is where you’ll tie in your bead chain eyes. Using a figure 8 motion, tie in the eyes securely so they don’t spin around the shank of the hook.

Step 3: With the worm chenille measure out about a hooks length of material and tie it in by the bend of the hook allowing the chenille to hang off the back, wrap it up to the beads and back down to the bend. Trim off any excess that may be showing.


Step 4: At the bend of the hook, tie in your peacock cactus chenille or peacock herl so they are secure. Once tied in, wrap your thread up to the bead chain eye.

Step 5: Wrap the cactus chenille around the hook shank and up to the bead chain eyes, once up to the eyes tie off the end securing the material to the hook and trim off the excess.

Step 6: Next pluck a feather from your hen back, pull off the lower fluffy fibers. Next take the tip of the feather and create a triangle by separating the feather fibers. This triangle will be your anchor point for the feather when you tie it in. Make sure you don’t pull the fibers off the stem.

Step 7: Tie in the feather at the triangle, once secured trim off the triangle. Next brush the fibers towards the back of the hook and wrap the feather around the hook shank creating a collar. Once you’ve made the collar tie off the rest of the feather and cut free the excess.


Step 8: Finally make a few more figure 8 wraps around the chain eyes covering up any material that may have been showing through and fishing off the fly with a few whip finishes between the bead eyes and the hook eye. Add some head cement or zap-a-gap and your fly is complete.

This is a very simple tie that you can whip up a few bugs in no time, although I have included a material list, don’t be affraid to try out new colors and different material to change the look or movement. Experimentation is one of the best things about tying!
Stay tuned for more fly patterns from the Fishwest staff, if you have any questions or patterns you’d like to request feel free to contact us at support@fishwest.com


